Growing microgreens in a jar is one of the most practical ways to produce fresh greens at home without a garden, a grow tent, or any special equipment. A wide-mouth mason jar, a handful of seeds, a small amount of soil or a paper towel, and a windowsill is genuinely all you need. Most varieties go from seed to harvest in five to fourteen days, which makes microgreens one of the fastest food crops a home grower can produce.
The process is straightforward but there are specific steps that determine whether your jar produces a healthy, harvestable crop or a mouldy failure. This guide covers both growing methods, the varieties that work best in jars, the exact steps from seed to harvest, and the problems that kill most first batches before they reach the plate.
Soil Method vs No-Soil Method in a Jar
Most microgreen guides mention soil and no-soil methods briefly without comparing them properly. Understanding the difference helps you choose the right approach for your situation before you start rather than discovering the limitations of one method mid-grow.
The soil method involves filling the bottom one to two inches of a wide-mouth jar with a seedling mix or potting soil, sowing seeds on top, and growing the microgreens rooted in that soil. This method produces microgreens with slightly more developed root systems and works well for varieties that grow taller before harvest, like peas and sunflowers. The downside is that drainage is limited in a jar compared to a tray, which means overwatering is an easier mistake to make. Soil-grown jar microgreens also require more careful rinsing before eating to remove any soil particles from the cut stems.
The no-soil method uses a moist paper towel, coco coir, or a thin layer of vermiculite as the growing medium. Seeds sit on the moist surface and develop short roots that anchor into the medium without penetrating deeply. This approach is less messy, dries out more visibly so you can see when to water, and is better suited to smaller seeds like broccoli, radish, and kale. The limitation is that it provides less structural support for taller varieties, which can flop sideways in a jar as they grow.
For most beginners starting with a jar, the no-soil method using a moist paper towel or coco coir is the easier starting point. Once you have completed one successful batch and understand the moisture management required, adding a thin layer of soil opens up a wider range of varieties.
Which Varieties Grow Best in a Jar
Not every microgreen variety is suited to jar growing. The jar format limits surface area and drainage compared to a flat tray, which means varieties that need deep rooting, significant horizontal space, or frequent bottom watering perform better in trays than jars. Choosing the right variety before you start is more important than most guides acknowledge.
Broccoli is the most reliable variety for first-time jar growers. Seeds are small enough to distribute evenly across a jar opening, germination takes one to two days, and harvest happens in seven to ten days. Broccoli microgreens have a mild flavour that works in almost any dish and one of the highest sulforaphane concentrations of any commonly grown microgreen. Sulforaphane is a plant compound studied extensively for its antioxidant properties, which is why broccoli microgreens consistently appear in nutrition research.
Radish is the second best choice for beginners. It germinates in one to two days and can be harvested in as little as five to seven days, making it the fastest microgreen you can grow in a jar. The flavour is peppery and distinct. Red-stemmed varieties like China Rose radish add colour to the jar that makes the growing process visually appealing as well as productive.
Kale and mustard both work well in jars. They take eight to twelve days to reach harvest size and produce greens with a stronger flavour than broccoli. Alfalfa is a classic jar growing variety that has been grown this way for decades. Its fine seeds and fast growth make it well suited to the no-soil sprouting method in a jar, producing light, grassy greens in five to seven days.
Avoid sunflower, peas, and wheatgrass for your first jar grow. These varieties produce tall, heavy growth that struggles with the vertical space constraints of a jar and requires more structural support than a jar opening provides. They also need more surface area than a single jar opening allows for adequate yield. Growers interested in sunflowers as a plant rather than a microgreen can learn more about full sunflower cultivation in a different context, but as a field-grown sunflower crop, the requirements are entirely different from microgreen production.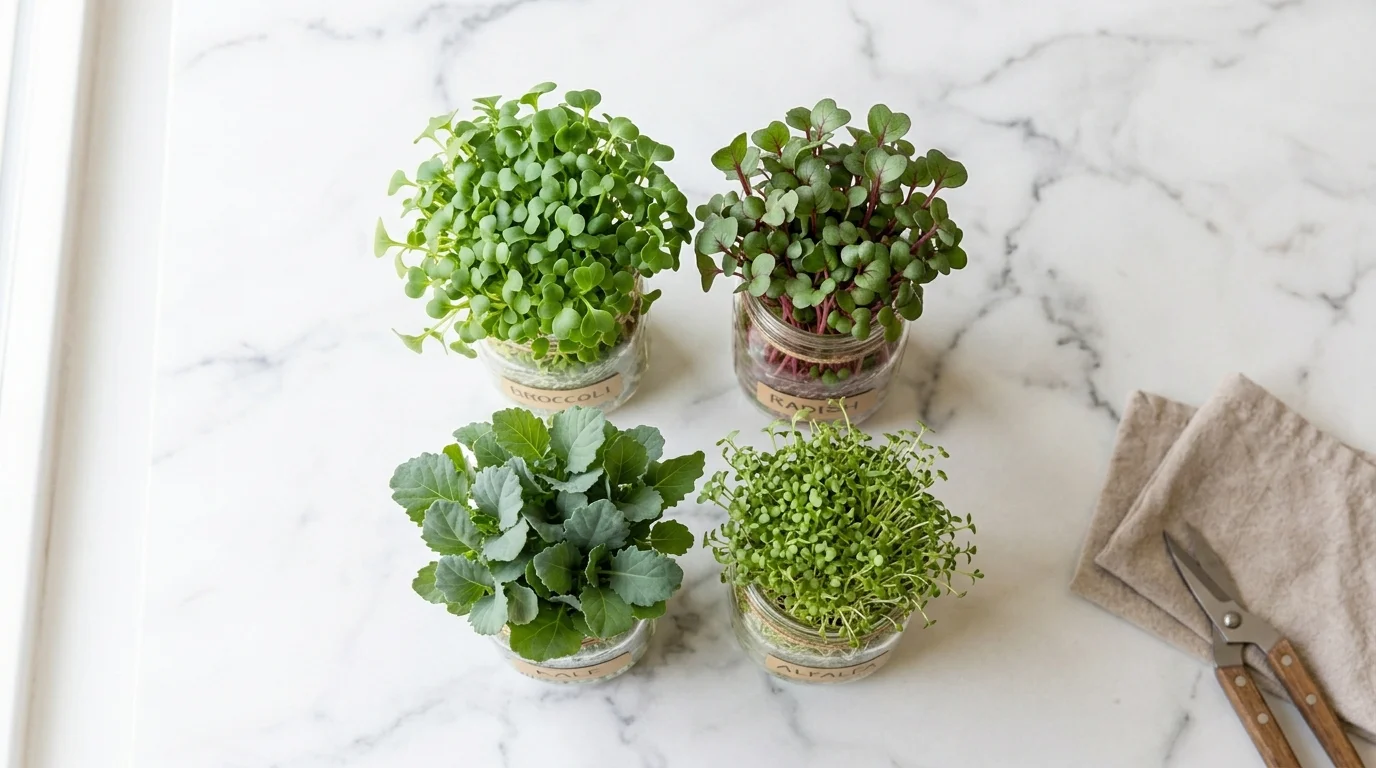
What You Need Before You Start
The jar itself matters more than most guides acknowledge. A wide-mouth mason jar is the standard choice for good reason. The wide opening, typically 86mm diameter for a regular wide-mouth mason jar, provides enough surface area to distribute seeds without serious overcrowding and allows adequate air circulation around the seedlings once they emerge. Narrow-mouth jars restrict air movement and create humid, stagnant conditions that encourage mould growth. If you only have narrow-mouth jars available, use them with the lid completely removed rather than trying to cover them with mesh.
For the cover, you need something that allows air flow while keeping seeds contained during rinsing. A piece of cheesecloth secured with a rubber band is the simplest option and costs almost nothing. Window screen mesh cut to size and held with the mason jar ring works well for seeds small enough to fall through cheesecloth. A coffee filter held in place with a rubber band is a useful backup for very fine seeds like alfalfa. Avoid solid lids during the growing phase after germination because they trap moisture and restrict the air circulation that healthy seedlings need.
Seeds should be specifically labelled for sprouting or microgreens. Regular vegetable seeds sold for outdoor planting are sometimes treated with fungicides or other coatings that are safe for soil growing but not intended for consumption in sprout or microgreen form. Untreated, food-safe microgreen seeds are available from specialist suppliers and many health food stores. Organic seeds are the cleanest option for microgreens that will be eaten within days of harvest without cooking.
Step by Step Growing Process
Measure two to three tablespoons of seeds for a standard wide-mouth mason jar. Larger seeds like radish need slightly less because they take up more space. Smaller seeds like broccoli and alfalfa need slightly more to achieve a good coverage density across the jar opening.
Rinse the seeds in cool water through your mesh cover or cheesecloth and then soak them in the jar with fresh cool water for six to eight hours. Large seeds benefit from up to twelve hours of soaking. This soaking step accelerates germination by softening the seed coat and triggering the chemical processes inside the seed that signal it to begin growing. After soaking, drain the water completely through the mesh cover, then rinse the seeds again with fresh cool water and drain again until no standing water remains in the jar.
For the no-soil method, place a moist paper towel or thin layer of coco coir at the bottom of the jar before soaking, then after draining, lay the seeds on top of the moist medium. For the soil method, add one to two inches of seedling mix to the jar, moisten it with a spray bottle until evenly damp but not wet, and then spread the soaked seeds across the soil surface in an even single layer. Press seeds gently into contact with the soil without burying them.
Cover the jar opening with cheesecloth or mesh and place it in a warm, dark location for the germination phase. A cupboard, a drawer, or a spot with a cover over the jar all work. Room temperature between 18 and 24 degrees Celsius produces the fastest, most even germination. Check the jar daily and mist seeds lightly if the paper towel or soil surface feels dry. Germination typically begins in one to two days for fast varieties and up to four days for slower ones.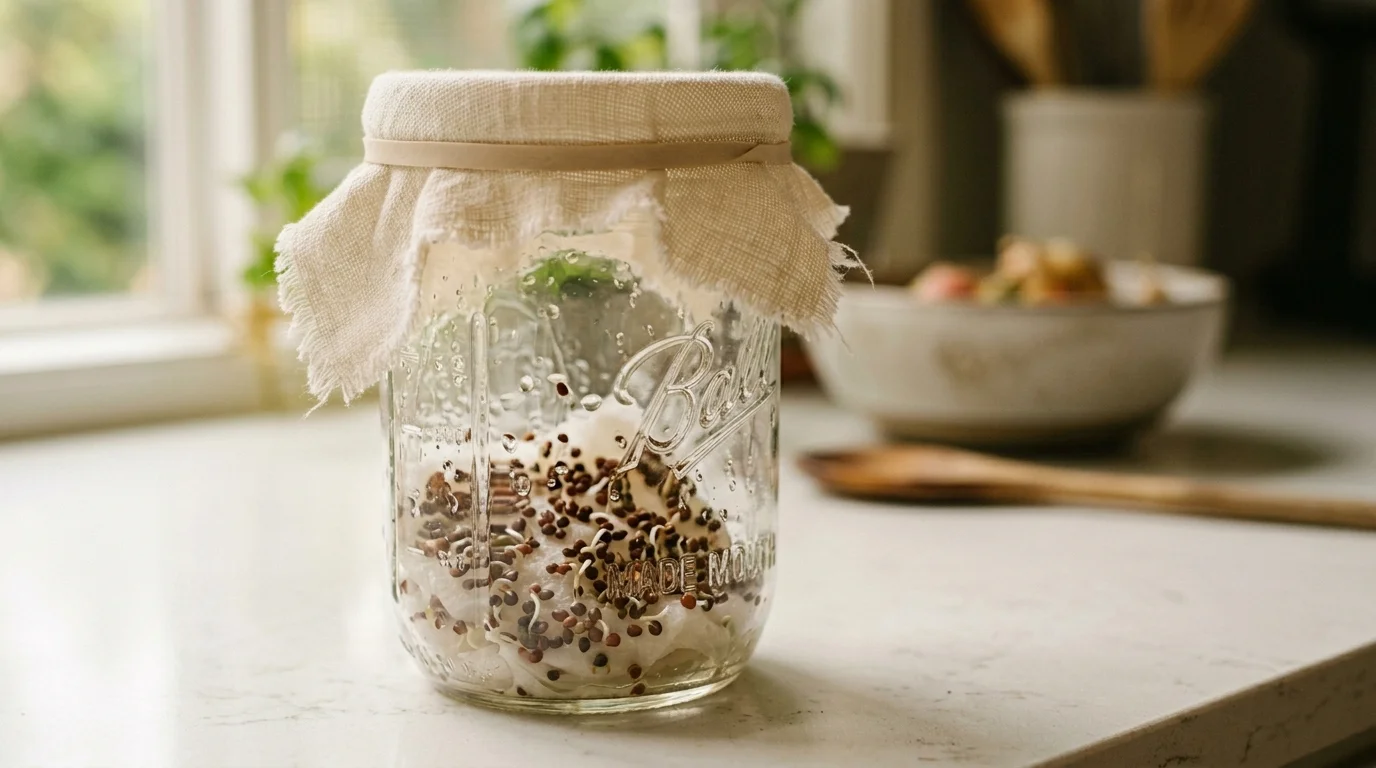
Once most seeds have sprouted and the first pale shoots are visible, move the jar to a location with six to eight hours of natural light per day. A south or east-facing windowsill is ideal. The seedlings will begin greening within twelve to twenty-four hours of light exposure as chlorophyll develops in the leaves. This colour change from pale yellow to green is not just visual. It marks the point at which the seedlings begin photosynthesising and producing their full nutritional profile rather than drawing only on the energy stored in the seed.
Expert Insight Note
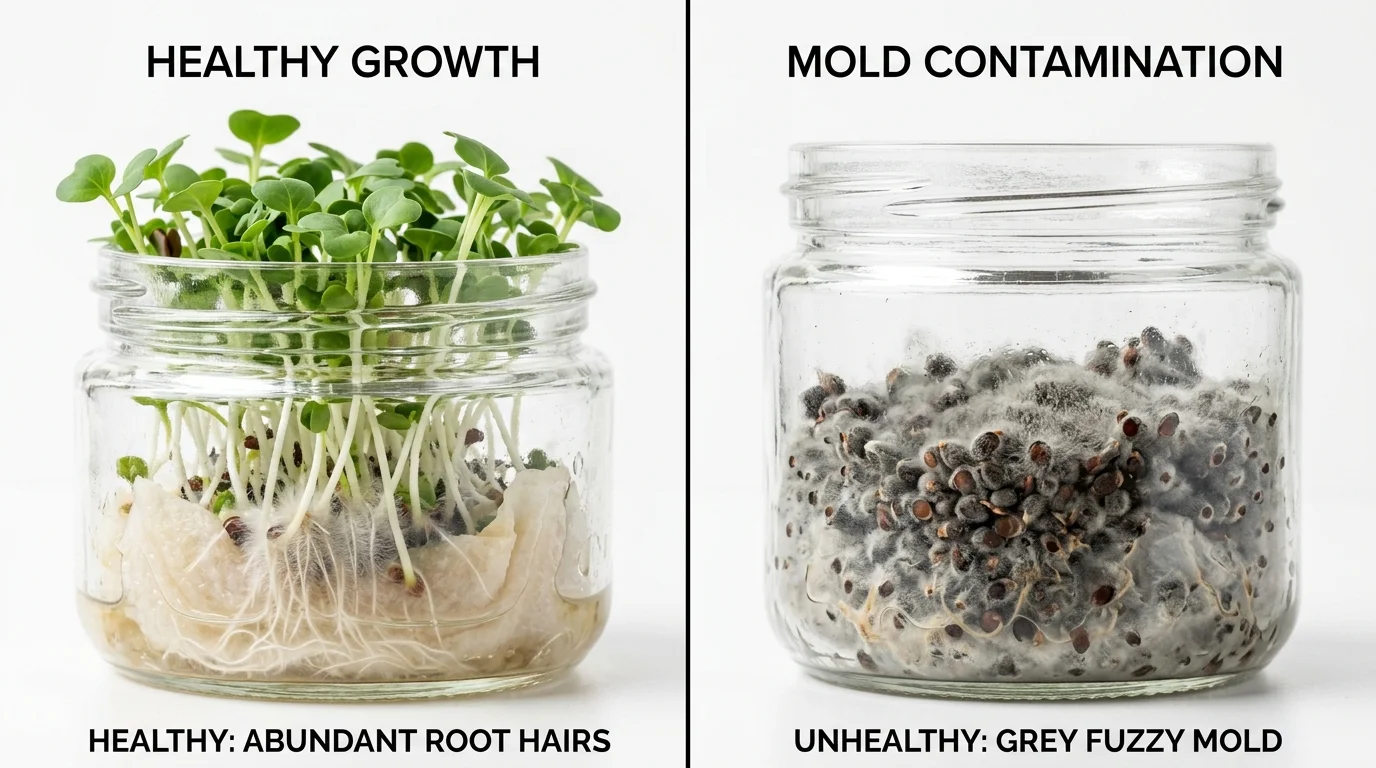
The single most common reason microgreen jar grows fail is confusing white fuzzy root hairs with mould. Healthy microgreen roots produce fine white filaments called root hairs that look very similar to early-stage mould when seen through glass. The key difference is location and behaviour. Root hairs grow from the base of stems and point downward. They appear uniformly across all seedlings in the batch and have a dry, fibrous appearance. Mould grows on seed hulls, appears in patches, has a fluffy or slimy texture depending on the type, and often carries a musty smell when you remove the cover. Growers who misidentify root hairs as mould and discard the batch are throwing away a healthy crop. If the growth is white, coming from the stem base, and has no smell, it is almost certainly root hairs. If there is any smell or the growth appears on seeds rather than stems, increase air circulation and reduce moisture immediately.
Watering microgreens in a jar requires more attention than watering them in a tray because jars have no drainage holes. Every drop of water you add stays in the jar until the plants use it or you drain it out. This makes overwatering the easiest mistake and the most damaging one.
For the no-soil method, mist the seeds or seedlings with a spray bottle once or twice per day. The goal is to keep the paper towel or coco coir consistently moist but never wet enough that water pools at the bottom of the jar. Tilt the jar gently after misting and drain any collected water through the mesh cover before setting it upright again.
For the soil method, water from the side of the jar using a thin spout or a spray bottle rather than pouring directly onto the seedlings. Check the soil moisture by pressing a finger into the mix at the jar edge. Water when the top half centimetre feels dry but the layer below is still slightly cool and damp. The seedling mix in a jar dries more slowly than in an open tray, so most growers water every two days rather than daily after the first week.
According to research published by the Food and Agriculture Organization of the United Nations on urban food production, microgreens use significantly less water per unit of nutrition produced than field-grown vegetables, making jar microgreens one of the most water-efficient food crops available to urban growers. This efficiency comes partly from the enclosed jar environment reducing evaporation from the growing medium surface.
Harvest Timing for Different Varieties
Microgreens are ready to harvest when the first pair of true leaves appear above the cotyledons. Cotyledons are the first leaves that emerge from the seed, often looking rounded and simple. True leaves follow within days and look more like the characteristic leaf shape of the mature plant. For most varieties, harvesting at the cotyledon stage is acceptable but harvesting at the first true leaf stage produces better flavour.
Broccoli reaches harvest size in seven to ten days. Radish is ready in five to seven days. Kale takes eight to twelve days. Mustard takes seven to ten days. Alfalfa is ready in five to seven days and is typically harvested at the sprout stage rather than waiting for true leaves. These timelines assume room temperature between 18 and 24 degrees Celsius and six to eight hours of light per day. Cooler temperatures slow growth. Less light produces leggy, pale seedlings that are edible but less flavourful than those grown with adequate light.
To harvest, use clean scissors to cut the stems just above the rim of the jar. Rinse the cut microgreens under cool running water and dry them gently with a clean cloth or paper towel. Use immediately for the best flavour and nutritional value, or store in the refrigerator between damp paper towels for up to five days.
Do Microgreens Regrow After Harvest
This is one of the most commonly searched questions about microgreens and the answer is important to understand before harvesting. Most microgreen varieties do not regrow reliably after cutting. Unlike herbs that regenerate from the same root system after trimming, microgreens are harvested at such an early growth stage that most varieties have not yet developed the root energy reserves needed to produce a second flush of growth.
Peas and sunflowers are partial exceptions. They sometimes produce a small second crop after the first harvest, though the yield is usually significantly smaller and the growing quality lower than the first cutting. For most other varieties including broccoli, radish, kale, and mustard, the practical approach is to start a new batch of seeds in the same jar immediately after harvesting rather than waiting for regrowth that may not come.
Staggering multiple jars at different stages of growth is the most effective way to have a continuous supply of fresh microgreens. Start a second jar three to five days after the first, and a third three to five days after that. By the time you harvest the first jar, the second is approaching harvest size, and the third is in early germination. This rotation system produces fresh microgreens every few days without any gap in supply. The same patient, systems-based thinking that works for microgreen rotation applies to other continuous production growing situations, including the principles behind maintaining consistent pond biology where continuous management matters more than any single intervention.